Are you looking to boost your gaming performance on an NVIDIA GPU? Whether you’re new to PC gaming or a seasoned player, tweaking your NVIDIA Control Panel settings can help you get better FPS and enhance your gaming experience. In this guide, we’ll walk you through some of the best NVIDIA Control Panel settings to optimize your system for gaming.

Updating Your GPU Drivers
Before we dive into the settings, it’s essential to ensure your GPU drivers are up to date. Updating your drivers can improve gaming performance and compatibility with the latest titles. You can update your drivers using NVIDIA’s dedicated guide.

1. Adjust Image Settings with Preview
- Right-click on your desktop and select NVIDIA Control Panel.
- Click on “Adjust image settings with preview” under 3D settings.
- Choose “Use my preference emphasizing” and move the slider to “Performance” for older PCs. For modern GPUs, select “Quality” or “Balanced.”
- Click Apply to save the changes.
2. Set Preferred Graphics Processor
- Go to the Manage 3D settings tab.
- Under Preferred Graphics Processor, select “High performance NVIDIA processor.”
- Click Apply.
3. Ambient Occlusion
- In Global or Program settings, find Ambient Occlusion.
- Set it to “Performance” or “Off” for older PCs. For modern PCs, choose “Quality.”
- Click Apply.
4. Anisotropic Filtering
- Locate Anisotropic Filtering and set it to “Off” for better FPS on low-end PCs. For modern GPUs, select “Application-controlled” or the highest setting.
- Click OK and then Apply.
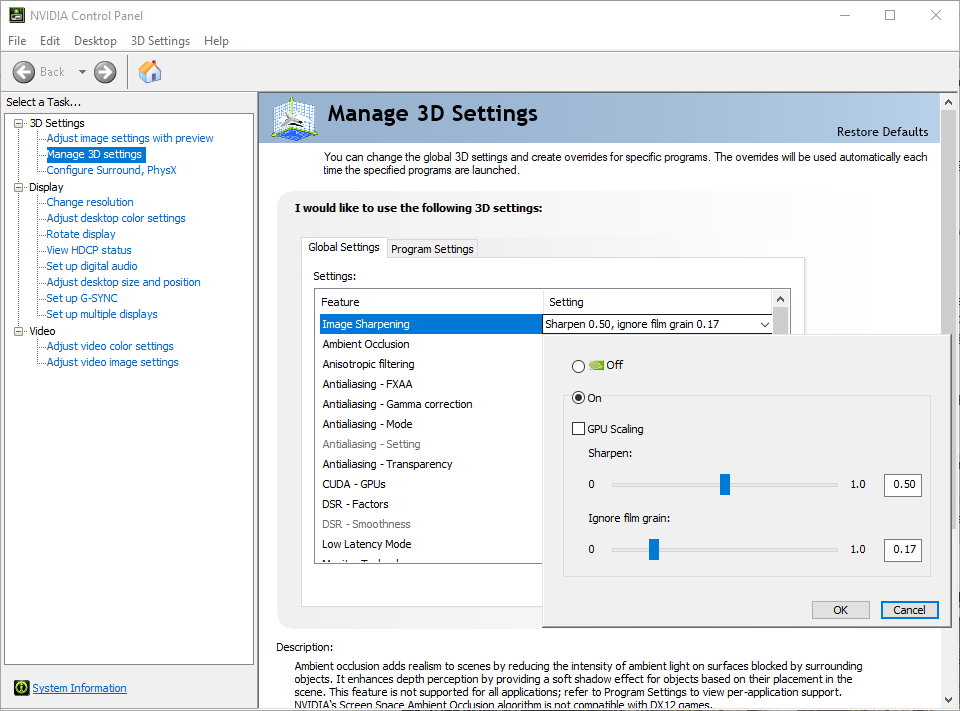
5. Image Scaling
- Find Image Scaling and turn it on.
- Use the Sharpen slider to set your preferred sharpening level (around 15-30% works well).
- Tick the Overlay Indicator checkbox.
- Click OK to apply the changes.
6. Antialiasing Mode
- Locate Antialiasing Mode and set it to “Off” for low-end PCs. For modern high-end PCs, use the “Application-controlled” option.
- Click Apply.
7. Low Latency Mode
- Find Low Latency Mode and select “Ultra” or “On” for faster input response time.
- Click Apply.
8. OpenGL Rendering GPU
- Find OpenGL Rendering GPU and select your preferred GPU.
- Click Apply.
9. Power Management Mode
- Find Power Management Mode and select “Prefer Maximum Performance” for better performance.
- Click Apply.
10. Texture Filtering – Quality
- Find Texture Filtering – Quality and set it to “High Performance” for low-end PCs or “High Quality” for modern PCs.
- Click Apply.
11. Assign PhysX Engine to GPU
- Go to the Configure Surround, PhysX tab.
- Select your NVIDIA GPU for PhysX processing.
- Click Apply.
12. Change Resolution & Refresh Rate to Highest Available
- Under the Display section, click on Change Resolution.
- Select the highest resolution and refresh rate available for your monitor.
- Click Apply.
13. Adjust Desktop Color Settings
- Select your Primary Monitor.
- Adjust the Digital Vibrancy slider to your preference.
- Click Apply.
14. Enable GSync For Smoother Gaming
- Click on the Setup G-SYNC option.
- Enable G-SYNC and select your display.
- Click Apply.
By adjusting these NVIDIA Control Panel settings, you can optimize your system for better gaming performance. Remember to experiment with these settings to find the best balance between performance and visual quality for your setup.
